Warehouse accounting at LeadVertex allows you to bring all products to a warehouse, set up automatic product write-off and see current product balance at any time. It also allows your operators to select cross-sell when processing orders.
To add a new product to the warehouse you need:
Enter your account in the menu, select Warehouse - Add new
You will see the «Add a new product» form, where you need to fill in the following fields:
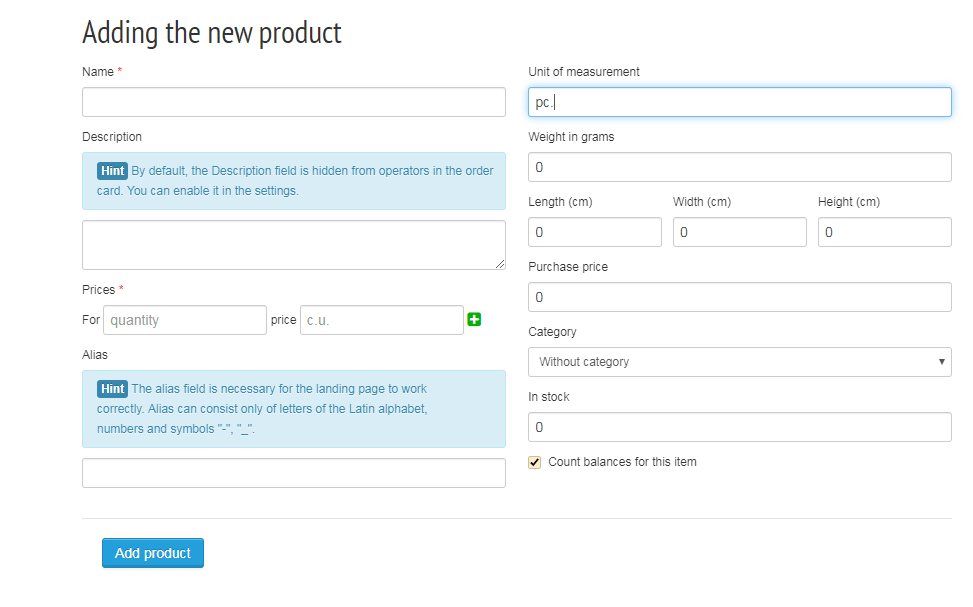
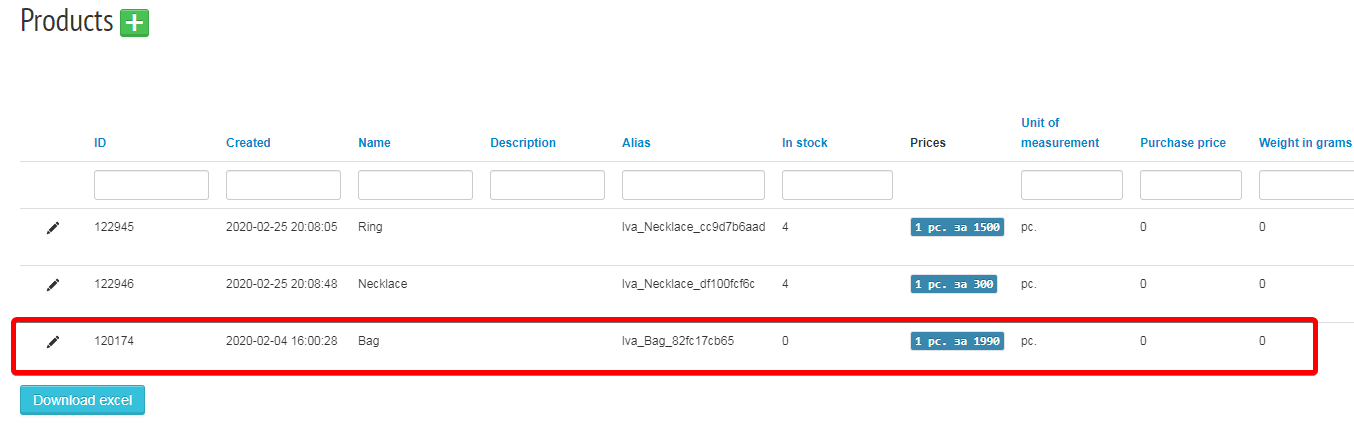
Next, you need to click "Add Product" button. Now the product will appear in the list of your products. To see the list of goods, you need to select the menu item Warehouse - List of goods
Bulk addition of goods is also possible. It is a bit easier than adding products individually.

You need to fill in the product name, description and alias, set the price and weight, then click “Add more” and immediately the form for the second product will open and so on.
Products can be grouped into categories. To add a category, go to Warehouse - Product Categories
To edit the, product you need to enter your account in the menu, select Warehouse - List of goods, select the necessary product and click the pencil icon and you will open item editing card
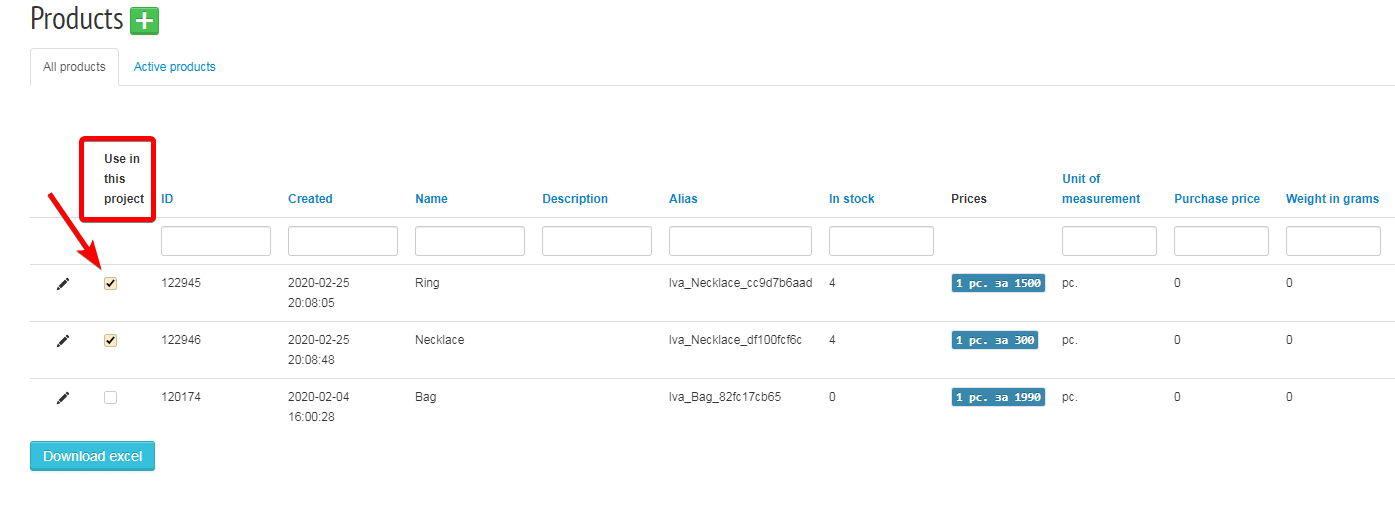
To add goods to the project, you need to enter your project and select the Warehouse - List of goods, and in the column “Use in this offer” mark goods you will use in this offer.
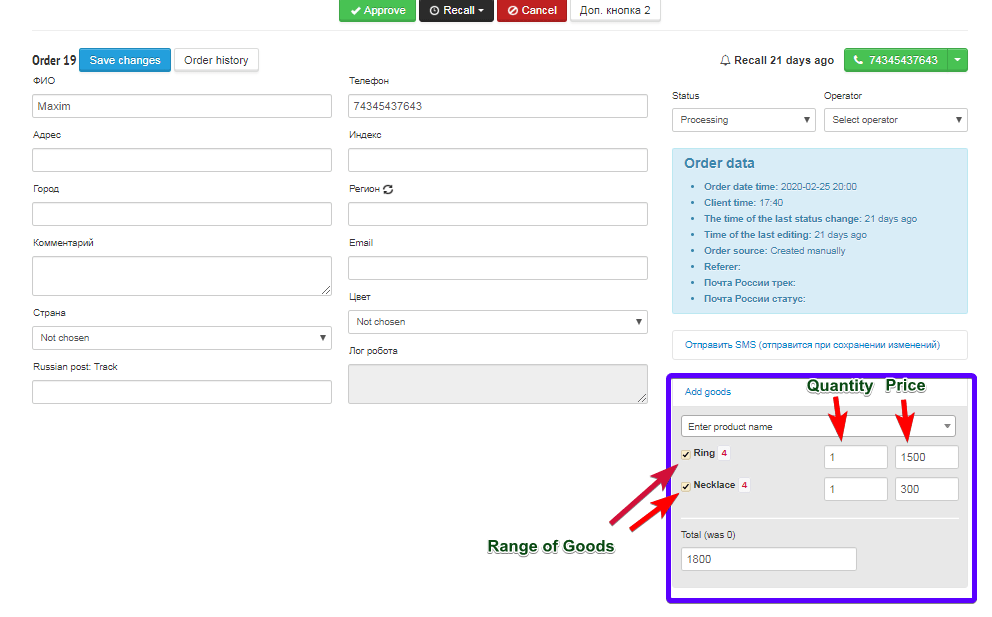
After the goods are added, we can add goods to the order. When creating / editing an order, the Add Products menu appears on the right, where you tick off the necessary products with ticks, set the quantity and price for them.
After adding a new order to the Order Management page, you will see your new order and the products added to it.
You can make bulk upload all product items from an Excel file. After uploading, all products will be included in the project where you downloaded them. You can add goods from excel only inside the project, so for loading you need to enter the project and open the Warehouse - Add product bulk. Next you need to arrange the matching fields. For example, if the names of your products are in column "A", you specify
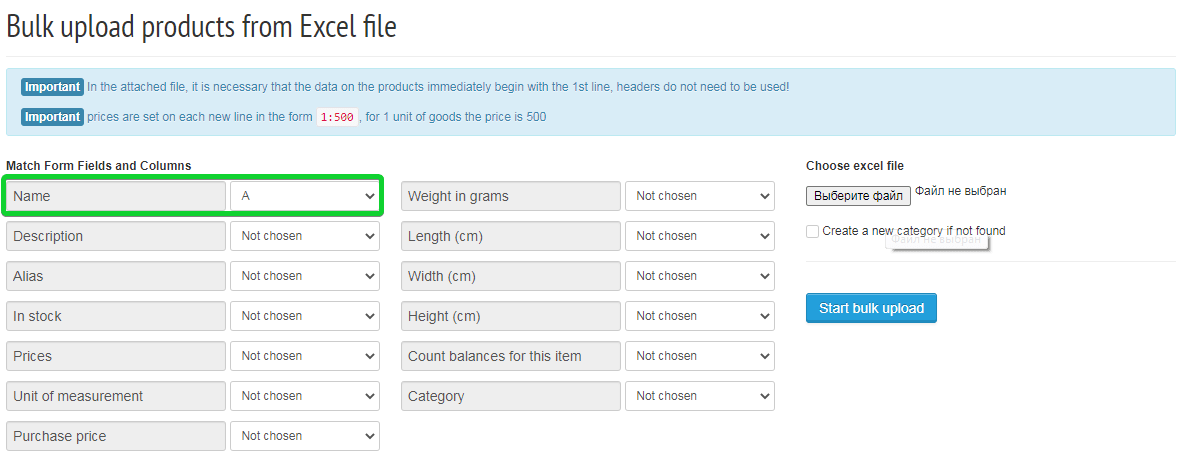
After you set the match, select the file to upload and add products.
Important! Prices are set on each new line in the form 1: 500, for 1 unit of product the price is 500
